You can integrate Stripe into InspectionPLUS to collect payment electronically with your clients. Stripe does charge a small percentage to complete transactions, click here to see Stripe’s updating pricing details.
Once enabled, you utilize the software’s “Email Payment Link” feature. This automated feature requires your clients to pay to be able to view the completed inspection report.
Here is a quick guide to help you set up and integrate Stripe.
Register for a Stripe account
Visit https://dashboard.stripe.com/register to create a new account. Make sure you have your current bank account, business information, and contact information.
Connect Stripe to InspectionPLUS
Connecting Stripe to InspectionPLUS requires copying and pasting important information, your API Key & Secret Key.
Find your API Key & Secret Key
After creating and finalizing the setup of your Stripe account, visit https://dashboard.stripe.com/apikeys (or click Developer then API Keys)

Copy & paste your Keys into InspectionPLUS
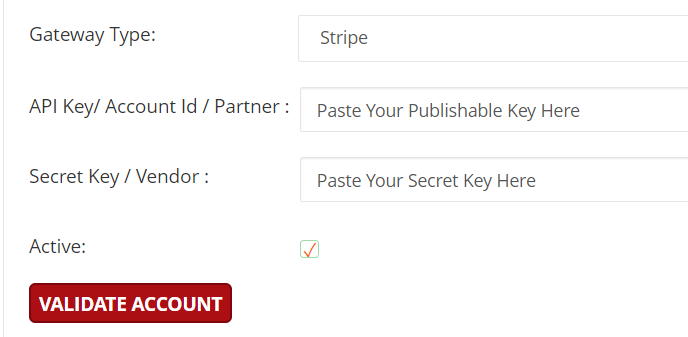
After finding your keys, navigate to the Payment Processing Account page in InspectionPLUS (note: only visible if logged in as Company)

On the Payment Processing Account, paste your key information and check “active”. Note API Key is the Publishable Key from Stripe
Now that you’ve entered the API information, we will test the account.
Test your Stripe Connection
After entering your key information, you will click “Validate Account” and then see this pop-up
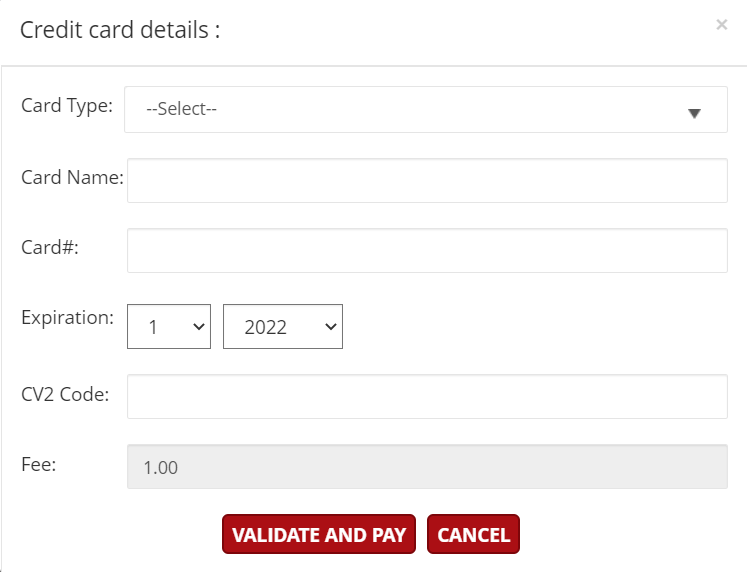
Enter in your credit card information to process a $1 charge. This will test whether your connection with Stripe was successful or not. You will see a new button that says “Add” click that button to save your payment process details.
After sending the test payment of $1, you can log in back into your Stripe account to check that it went through.